Spending
time to fully plan out a project, or at least one component of a large project,
prior to making that first cut, boring a pilot hole, or applying an initial
layer of epoxy is a wise investment.
The time I
devote to creating templates and testing designs is definitely increasing as my
experience working on boats expands. Or perhaps as the size and cost of
the boats on which I work is increasing. I vividly
recall the trepidation with which I approached drilling a hole for a drain plug
in a new plastic whitewater kayak over twenty years ago. Now I find myself boring 1-7/8” holes in the
hulls of custom built offshore sailing vessels that are closer to 100’ than the
length of that long ago kayak. Perhaps expending time planning prior to action equates to wisdom gained
through time and experience, I am, at least chronologically speaking, what most
Americans consider middle age.
Ok, enough philosophical
musing. Let’s talk boat projects. I’m in the head scratching, throw pasta at
the wall and see what sticks, scrap that idea and move on to the next portion
of three different projects.
Ice Box Lids…
The
fabrication of a new ice box is complete, save for those damn lids. I cannot figure out how to best add insulation
to the inside of the lids and insure a good seal along the opening.
 |
| Notes from experimenting with various methods of insulating the lids |
Never
thought the lids would be the most difficult aspect of the re-build. See our Ice
Box Rebuild Photo Album for images of the latest progress.
Plumbing Drains…
 |
| Myriad of plumbing fittings. Remind anyone of days spent playing with Legos or Tinker Toys? |
In an effort
to reduce the length of hose runs and not feed too much water to the drain
manifold (see – New
Deck & Bilge Pump Drain Manifold) we are adding two 1-1/2” thru-hull
fittings above the waterline on opposite sides of the hull. The port fitting will serve as a discharge
for the upper, 3700G/H bilge pump. The
plumbing associated with this system required only minor experimentation.
The
starboard thru-hull act as a drain for the deck scupper. As with our previous vessel (SV C’est la Vie) we want the ability
to fill water jugs from the deck scupper. The ability to collect (then filter)
rain water off the deck proved very helpful on our last extended trip in the
islands.
 |
| Test fitting the final draft of the new starboard deck scupper plumbing. |
The
mechanics of the plumbing took some time to work out. We definitely want to have the details worked out prior to drilling the hole
in the hull. See our Quarterberth
Re-fit Photo Album for the current progress on this project.
Electrical Panel…
Designing
the inner workings of the electrical panel from scratch is both enticing and
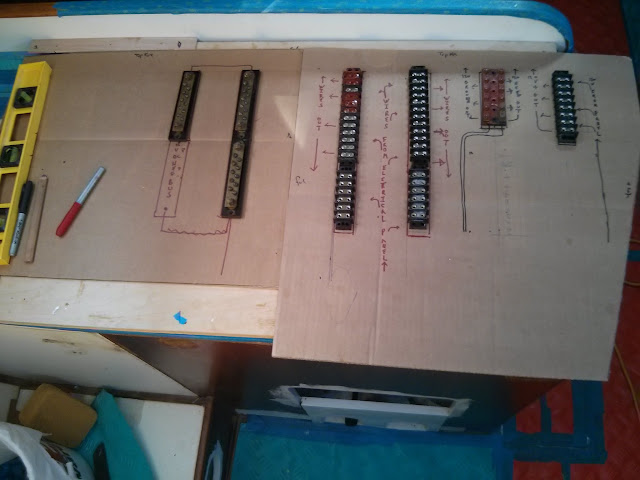
daunting. I began by creating cardboard
templates of the space available.
 |
| Cardboard templates of the space available for the electrical panel wiring. |
I then
experimented with the layout of terminal strips and busbars atop the templates using different color pens to illustrate AC & DC wire runs.
 |
| Experimenting with the layout of AC & DC wiring, terminal strips, and busbars. |
Once
satisfied with the layout, I taped the templates into position.
 |
| Test fitting the electrical panel template in position along the hull. |
Then made a
few more modifications to the design.
See our Navigation
Station Re-Fit Photo Album for images and notes current progress.
The planning
continues.


No comments:
Post a Comment