SV Pilgrim - 1979 Morgan 382 - Homeport: Beaufort, NC

Tuesday, March 25, 2014

Interior Tabbing Repairs Update 2

Two previous posts March 6thWhat A Grind  & March 13thInterior Tabbing Progress Report, precede this update.

Over the past week most of our efforts and progress continue to be in the head area. 

I created a ¾” plywood floor for the area under the sink / over the mast bucket and stringers.

Test fitting the 3/4" plywood floor.
The plywood is bonded to the mast bucket, the ¾” mast bucket brace and the 2x4 floor stringer with thickened epoxy.  To assist with the bond, ¼” wood screws attach the plywood to the mast bucket and the 2X4 floor stringer.  While the assembly was still wet, I added fiberglass tabbing between the underside of the plywood and all the surrounding vertical members.

Once the underside of the assembly had cured, Anne & I worked together to apply heavy 1708 cloth between the topside of the plywood and all the surrounding vertical surfaces.

Tabbing extended to all the surrounding vertical surfaces above and below.
The resulting structure will add significant strength to the area and additional support for the head pan.  Structurally our repairs to this area are complete.  Next up for the area under the head counter are new through hull fittings and supports for the holding tank.  Future progress in the head can be found in our Head Refit photo album.

Just outside of the head, under the cabin sole are ongoing repairs to support the beam below the head door.  The support beam runs bow to stern along the midline of the vessel.  This is another area on our M382 in which the Morgan recall team completed a faulty repair job.  The team failed to properly prep the hull and wood brace prior to applying the fiberglass.  The result was tabbing that sheared away from the support beam.

Tabbing added by the Morgan recall team sheared away from the head pan support beam below the head door.  Note the two wood screws (dots to left and right) added by previous owner. 
A previous owner attempted to remedy this issue and prevent the head pan from sinking by inserting screws through the breakaway tabbing and into the wooden cross brace.  Rather than attempt re-bond the existing fiberglass, I chose to cut away the tabbing and create a solid base to support the beam from below.   

The detached fiberglass removed to expose a 3" thick laminated plywood support beam.
I removed the old fiberglass with a cut off wheel on a 4” angle grinder and then ground down the entire area to bare fiberglass.  My solution to supporting the cross brace required filling in the valley between the vertical support and the hull.  To provide drainage the initial layer of fill included a ¾” PVC tube set in thickened epoxy.  Next multiple layers of FRP blocks were set in thickened epoxy.

Initial layer included a 3/4" PVC drain pipe set in thickened epoxy

1/2" green FRP Blocks set in thickened epoxy used to build up a solid base to support the cross brace.  I secured the forward end with a new layer of 1708 mat. 
Using ½” thick FRP blocks saved time by allowing me to fill the area without worrying about excessive heat buildup from curing thick applications of epoxy.

Solid base for supporting brace aft (left) and tabbing forward (right) complete
The top layer of FRP, green panel on left above,  was set atop a large piece to 1708 mat that extended from the midline of Pilgrim to far under the starboard sole.  The mat should serve to bond the entire assembly to the hull.  The top piece of FRP extends under the full width of the cross brace.  A 1/8” gap remains between my assembly and the head pan support beam above.

1/8" to 3/16" gap for shim(s)

My plan is to epoxy a 1/8” to 3/16” shim into this gap and then add tabbing between the cross brace and the hull.   Hopefully we can finish up work in this area over the next week.

Moving aft in Pilgrim’s cabin, the pilot berth’s new partial bulkheads received oak cleats.

Oak cleats added to top of new pilot berth bulkheads.
The cleats are set in thickened epoxy and through bolted to the ¾” plywood bulkheads.  The cleats will provide a substantial base to which the pilot berth deck can be attached.  

Additional images of pilot berth project can be found in our Pilot Berth Rebuild photo album.

On the opposite side of the cabin, the partial bulkheads under the forward galley counter top received tabbing.  The Morgan factory only tabbed the bulkheads to the hull in sections not along their full length.   We added 1708 mat to the sections lacking tabbing.

Upper section of partial bulkheads under galley countertop
Lower section of partial bulkheads under galley countertop / sinks
Now the bulkheads are tabbed to the hull along their full length.  Like the head area, the galley tabbing repairs are complete.  Once the new through hull fitting  for the sink drain is installed then we can move on to priming and painting the area.  Additional photos and future progress in the galley can be viewed in our Galley Refit Photo Album.

Tuesday, March 18, 2014

Winch Covers - a great rainy day project.

Rainy weather may have prevented work out in the boat yard today, but it gave me time to get some sewing done. 
Starboard cockpit winch - naked and exposed to the sun.
We purchased Pilgrim with two Barient/Barlow 25 self-tailing winches in the cockpit.  The rope jaws on these winches are plastic and susceptible to UV damage.   I’ve learned that Lewmar purchased Barient and replacement parts are now very difficult to find.   Thus the need  protect the winches with sunbrella covers.

Fortunately Sailrite recently posted a how to video on making winch covers .  I followed the directions on the video nearly verbatim – unusual for myself.  

Much of the canvas work on C’est la Vie was “toast” colored Sunbrella so we have many spare remnants around for small projects.  I figured the light brown color would work well alongside Pilgrims wood cockpit combing. The only other  necessary component was a couple short lengths of bungee cord.
All components of the covers ready for assembly.
Sewing the top piece to the vertical sides is a bit tricky, but as the video recommends going slow eases the process.

tensioning the bungee on the first cover to be completed.

I could not wait for the rain to cease before running out to the boat for a test fit.
test fitting portside cover 

Success!  Another project to tick off the Pilgrim to do list.

Thursday, March 13, 2014

Interior Tabbing Progress Report

In my March 6th post – What A Grind – I highlighted areas in Pilgrim’s interior where we plan to add or repair tabbing… quarterberth, galley, pilot berth, and head area.   Over the past week only the galley has not received attention.

While prepping the quarter berth for new tabbing, I discovered that the structural component of the wall between the berth and the engine room is ½” plywood.  The additional ¼” of material is a cosmetic plywood façade glued to the structural wall with contact cement.

Removing sections of the 1/4" plywood facade from the wall in the quarterberth
If we hope to gain any strength from this tabbing, then we need to epoxy the new tabbing to the structural wall, not the facade.  In most areas the ¼” plywood separated easily using a putty knife, but a few areas required a hammer and chisel.  Below is an image of the area prepped and ready for cloth.

Quarterberth taped, masked and ready for cloth.

Along the top of the wall between the berth and the engine compartment we added a couple layers of lighter weight cloth. We applied heavy 1708 cloth in the areas visible in the image below.

new quarterberth tabbing curing
Since our plan for the quarterberth is storage space,  we will simply sand down the new tabbing , then prime, and paint the area.   We do plan to add additional bracing and tabbing under the quarterberth, but I’ll save that for a future post.  Check our Quarterberth Rehabilitation Album for more images of progress in this area.

In the pilot berth we again used heavy 1708 cloth on both sides of the new ¾” bulk heads

test fitting fiberglass cloth pieces in pilot berth area

I attached the original end sections (aft end section visible in background of image above) to the adjacent bulkheads with multiple ¼” wood screws and then tabbed sections  to the seat back.

The new pilot berth bulkheads are screwed into the cleats along the seat back. Tabbed to the hull and floor on the forward facing side. Tabbed to the hull, floor, and seat back on the aft facing side.
The new intermediate bulkheads are now screwed and glassed in place.   This assembly will add significant strength to the seat back / chain plate anchor.  The next step here is to add oak cleats for reattaching the pilot berth deck then sand and paint the area.  Check out our Pilot Berth Rebuild Album for more images of progress in this area.

The area around the head pan and mast bucket has received the greatest amount to effort since the last post.  The 2X4 that serves as a floor stringer forward of the mast bucket (see image below) was floating unsupported on both port and starboard ends. 

Unsupported 2X4 stringer on left in this image.  3/4" plywood member is bracing for mast bucket.  Pilgrim's mast bucket is supported by epoxy thickened with granite powder set atop the keel.
I laminated multiple layers of ¼” and ½” FRP creating shims to fit between the hull and the 2X4 on both ends.

shims for supporting 2X4 floor stringer
These shims were set in place with thicken epoxy.  We then applied multiple layers of 1708 cloth to secure the shims and distribute the load across a larger area of the hull.  While glassing in the area we also added  layers of cloth to tie the head pan, floor stringer, the ¾” plywood mast bucket bracing, and the bulkhead together.

Green FRP shim is visible under 2x4 in this image. Multiple layers of heavy mat on left in image serve to distribute loads from shim across the hull and also support the head pan.
We are not done with our work in this area.   Stay tuned for more structural additions to better support the head pan and mast bucket.

While sticky and in the area we also added a couple layers of cloth to a section of the bulkhead under the head counter.  An 18” section of this critical bulkhead lacked any factory tabbing – WTF?

2 layers of mat added to a section lacking tabbing in the original construction.
Thanks to Anne for spending half a day suited up and wetting our fiberglass cloth.

Anne suited up for work in Pilgrim

Ok, no more Breaking Bad references or she may never don the coveralls and respirator again.

If you want to see our current progress or additional images check out our Tabbing Repairs Album.  We add new photos each time we make progress on this project.

Sunday, March 9, 2014

Sun Cover for Dodger Windows - Part 2


Due to the irregular shape of the side windows and some challenging topography where the dodger meets the cockpit combing, I decided to start the install with the center panel.  I’ve installed snaps on past projects, but for this project I had a new tool in the arsenal… the Snaprite by Sailrite

inaugural use of the snaprite system

Specialized dies transform a rivet gun into a tool for placing and installing snaps.  The sailrite instructionalvideo  explains this system far better than I could hope to do in text.

Front panel installed now onto the sides
As with any tool there is a learning curve.   I broke multiple mandrels attempting to set a single snap stud (base) and still was unable to achieve a proper roll over on the eyelet barrel.  Achieving a secure set on the studs was so frustrating that I reverted to the old system of using a die and punch by the time I began work on the side panels .  The Snaprite tool did shine when used for locating and setting the snap button & socket into the new sun covers.   This tool really took the guess work out of locating the proper place to install the top portion of the snap. 

Once both the center and side panels were installed, I realized that the long gap where the center panel met the side panes could catch enough air to generate noisy flapping. 

the intersection of the two panels did not provide a suitable area to mount a snap stud
The dodger did not have a site for attaching snaps in this area.  I return home to the sewing machine with the covers in tow.   If the site was unsuitable for a snap, perhaps a velco?

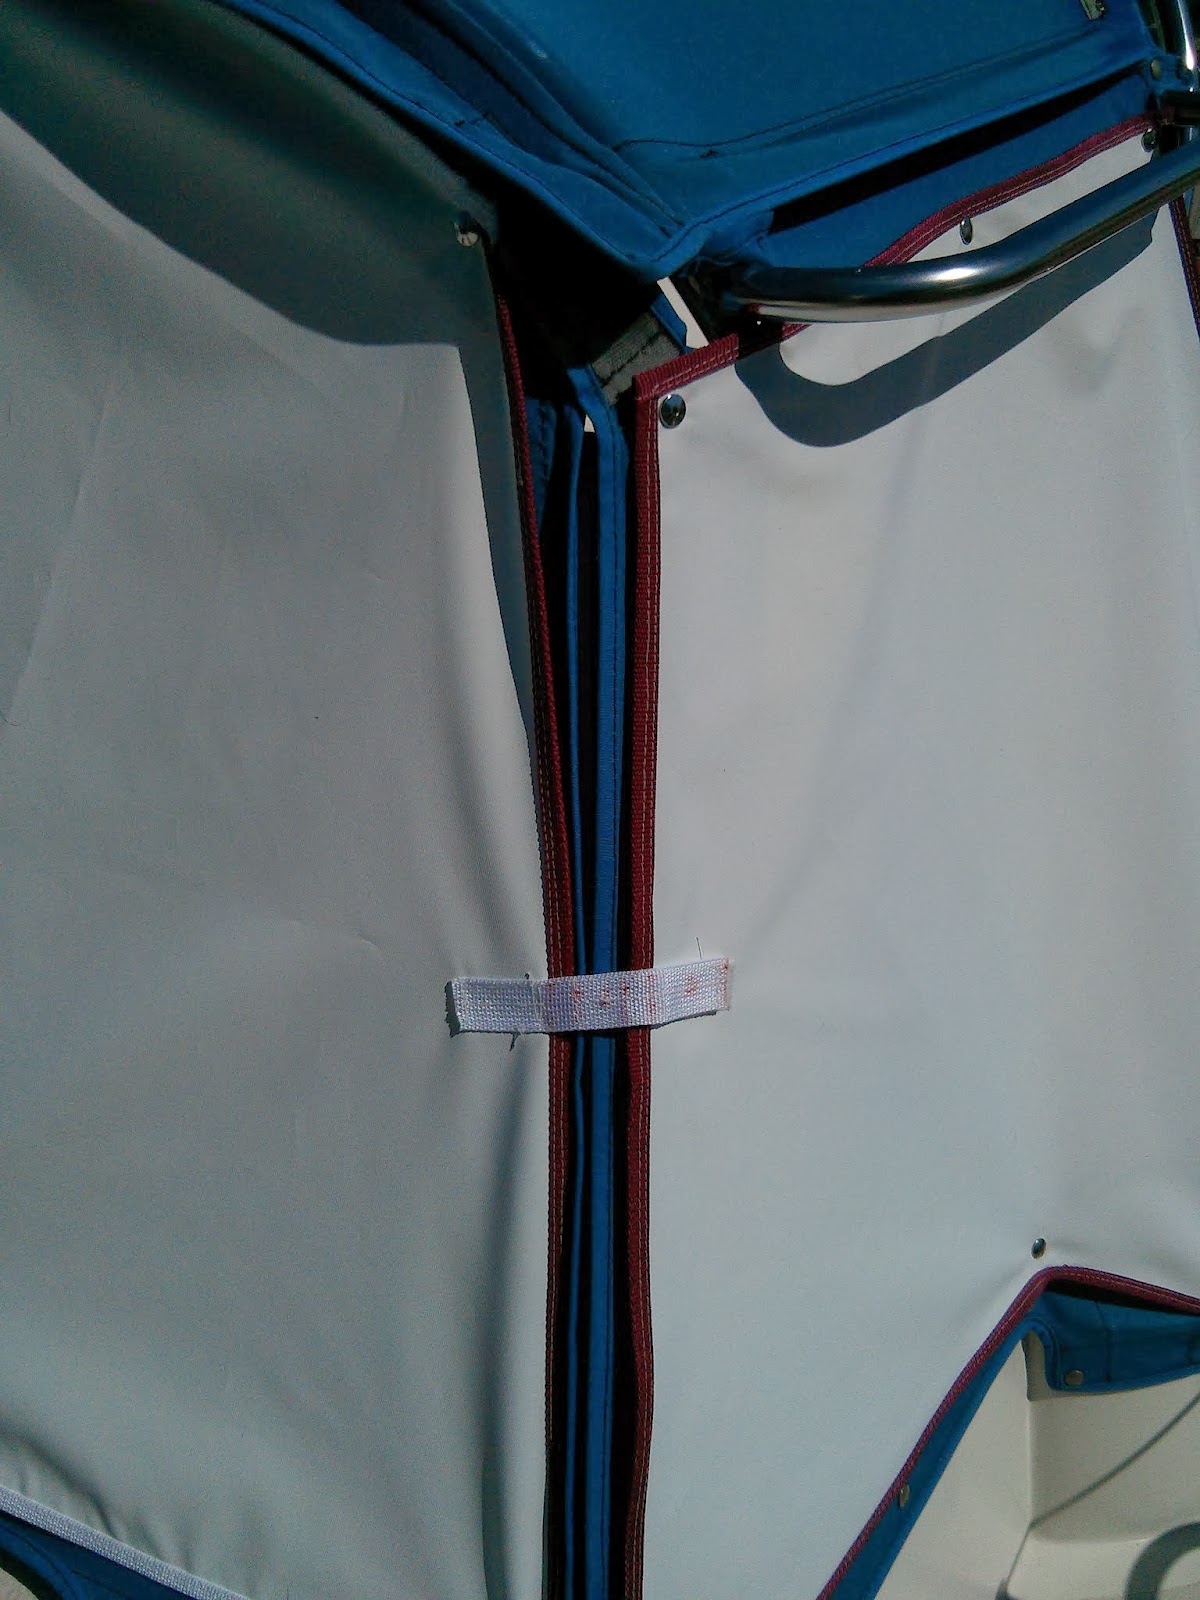
using webbing an velcro to secure the panels at the intersection
A few inches of of velcro and some 1” flat webbing  saved the day. 

Not only to the cover’s protect the widows from UV damage, but they provide a nice bit of privacy when in a crowed anchorage or at the dock.

the view from the cockpit with the sun covers installed
Creating the dodger sun covers is the first project fully completed on SV Pilgrim!


As with most of our projects we have created a photo album – Dodger Sun Covers – Winter 2014, that contains additional images.  All our albums can also found  in the  links section, right side pane of our website – M382Pilgrim.blogspot.com 

Saturday, March 8, 2014

Sun Cover for Dodger Windows - Part 1


The quality of Pilgrim’s dodger stood out on my first visit to the vessel.  The clarity of the strataglass windows is remarkable when compared to other vessels in our boat search.

Jeff on the foredeck while prepping Pilgrim for transport in the Sandusky Harbor Marina
Now that we own Pilgrim and plan to take her south, protecting her wonderful windows from year round, low latitude UV damage is a high priority on the project list.  Fabricating a removable sun cover for the windows seems like the best solution.

We feared using royal blue that matches the existing dodger fabric would generate too much heat in warmer climates.  Our choice of colors…  a contrasting white UV resistant fabric.

Using the center window panel to create a rough cut out of the fabric. 
Initially I attempted to measure out the pattern.  This worked well to estimate the amount of fabric for the job, but proved too inaccurate for creating a pattern.  After one false start that resulted in a permanent blue line across the lower section of the front panel, I tossed aside the tape measure and simply outlined the panels to create a rough cut out of the covers.  With the fabric atop the panels I was able to fine tune the dimensions of the cover and thus skipped creating a pattern.
I placed the fabric atop the panel to fine tune the shape of the cover.
The side panels were created via an identical process.
using the side panels as pattern for the cover
In the design phase, I decided to use edge binding rather the hemming the covers.  Using red or green 1” webbing as binding tape for the edges allows for easily identification of the port & starboard side panels.  Additionally, I used red and green on the corresponding sides of the center panel to assist with orienting it to the dodger.  White binding tape was used for the top and bottom edges of the center panel.
adding a second row of stitching to the binding tape on the port side panel
To provide additional longevity to the covers the edge binding is double stitched in place. 

The covers were now ready for the installation of snaps that will affix them to the dodger.  I felt the snap placement would be more accurate if completed with the windows installed in the dodger.  Time to load up the project and head out to the boat…  


Thursday, March 6, 2014

What a grind...

After a month of pulling wiring and extricating plumbing, I am now quite familiar with many of the nearly inaccessible voids and dark recesses of our 1979 M382 Hull#115.  I’ve had a good look at the bones of the vessel and must admit Morgan’s construction techniques on our M382 leave much room for improvement.  The tabbing along many of the partial and full bulkheads is intermittent.   In our 1966 M34, the tabbing between bulkheads and the hull extended non-stop from the hull deck joint to the end of the bulkhead or in the case of a full bulkhead all the way around to the opposite hull deck joint.   

Ok, ok not everyone reading this is familiar with boat construction.  Feel free to skip down the to next paragraph if you are familiar with  the concept of bulkheads and tabbing.  The hull of the M382 consists of layers upon layers of fiberglass mat. These layers are constructed over a mold that provides the hull's basic shape. To retain the shape of the mold once the vessel is subjected to the stresses of life at sea the hull requires internal bulkheads.  Inside the boat these bulkheads appear as full walls (reaching from floor to ceiling) and as partial walls (supports for the counter in the galley, seat backs in the salon, supports for the vee berth, etc.)  These walls are attached to the hull by wide strips of fiberglass mat.  These strips, epoxied to both the walls and the hull, are called tabbing.

In Pilgrim, I have discovered multiple areas where the tabbing runs for 18” then is gone for 12” then runs for 18” and so on.   

Looking down into the locker below the forward galley counter top
The image above is looking down into the galley dry storage locker (the locker floor and hot water heater are removed).  The ¾” plywood walls that serve as supports for the counter top also serve as partial bulkheads.  The areas I ground away the white gel coat down to the brown fiberglass of the hull are lacking tabbing.  Not shown in the image are the two identical areas of missing tabbing just above the top of the picture. 

Amazingly I found similar intermittent tabbing along the full bulkhead just forward of the mast.  This area is accessed by squeezing through a cabinet door under the counter in the head or through a hole in the head counter top.    In the image below, looking down through the hole in the head counter top,  I have removed all the plumbing and the three through hull fittings that served the head plumbing.  It is difficult is see in this image, but the aft bulk head (right in image) lacks tabbing to the hull in an area the spans from the upper, large through hull to the smaller through hull opening lower down.

Space under head counter top with all plumbing removed
Once the grime and gel coat are ground away the missing section of tabbing is much more visible. 

Space under counter top in head after grinding.  Note:  hose in foreground is for shower sump.
Unfortunately while grinding away the gel coat in the head area, I discovered much of the tabbing surrounding the sole stringers, mast bucket stringers, and head pan was installed poorly.  Much of the tabbing in this area was epoxied onto the hull gel coat rather than to the hull fiberglass.   This method of installation is unacceptable as bonding to the gel coat does not provide the strength necessary to sustain loads in this critical location.  Some of the tabbing had already separated from the gel coat.  

In the early 80's Morgan had a recall on M382's due to structural issues in this area of the vessel.  The company sent out repair team(s)  to fix all the M382's. Based on my review of conversations on the Morgan 38 discussion board, I am confident that Pilgrim was visited by a repair team.  I believe that in many areas on Pilgrim the repair team did not remove the gel coat from the hull prior to installing new tabbing.   In many of these areas the tabbing has failed.  Fortunately, I have not discovered any evidence of hull deformation (i.e. irregularities on the exterior hull surface, gaps between the bulkheads and the hull, gaps between the bulkheads and the sole, etc.)  

With all the plumbing gone,  the wiring removed, and the rig out of the boat now is the time to address these concerns. 

We are  also addressing a lack of tabbing in the  quaterberth…
Grinding areas in the quarter berth that will be receiving additional tabbing
And adding tabbed, partial bulk heads under the pilot berth…
Before:
Pilot berth with plywood decking removed. The dividers are not tabbed to the hull?!
After…
New 3/4" plywood dividers that will be tabbed to the hull and the seat back.
We are focusing our current efforts aboard Pilgrim in the cabin from the quaterberth to the door into the vee berth.  Hopefully the areas outside this core area of the vessel do not contain more surprises.

If you want more details and images from this project please check out our photo album – Tabbing Repairs – 2014.

We will continue to add photos to the album and post updates here.


Back to the grind.

Monday, March 3, 2014

The Purge Is Nearly Complete

Pilgrim arrived in Beaufort a little over one month ago.  Despite three winter storms and a bout with the flu, we are now the cusp of purging all the old plumbing,  through hull fittings, transducers, wiring, and much, much more.

Using a chisel to remove the plywood pad under on of the defunct transducer through hull fittings.
Over the past month we have stripped out all Pilgrim’s plumbing from the galley faucet to the through hull fittings.   We have discovered two critical systems near failure in the plumbing systems (see Justification for Removing All the ThroughHulls & Plumbing). 

Nav Station with electrical panel and all wiring removed.
We have also removed most of the electrical system from the breaker panel to the brass light fixtures to the battery banks.

Wiring and plumbing in the bilge.  This in now all gone.
We found some very creative use of wire nuts and silicone for DC wiring in the bilge and pulled three, non-functional transducers from the hull.

Surprise! 2 to 4 inch void behind the cabinetry under the pilot berth.
We have also discovered vast amounts of hidden storage spaces.  It seems that Morgan fabricated much of the cabinetry for the 382’s in the wood shop then affixed it  to the vessel  prior to installing the deck.  For this manner of construction to work efficiently the cabinetry had to drop in place one ready for install.  Thus there is a great many voids behind interior installations such as the galley counters, the quaterberth headliner, the pilot berth bunk, and the head pan.  Where possible we are modifying existing interior structure to allow us access to the additional space.

Pile of old hoses and lumber pulled from Pilgrim.
Meanwhile the pile of scrap material is piling up under Pilgrim.

Hopefully our next post will highlight us beginning the rebuilding phase of Pilgrim's refit.